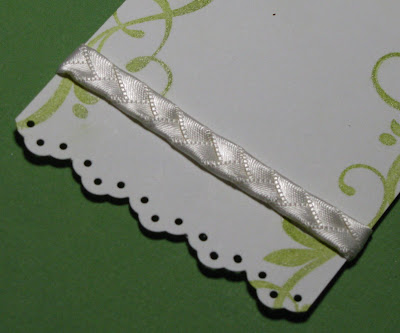
für meine Sommer-Karte "Shine" habe ich ein Band geflochten. Hier ein kleines Tutorial:
I used a 6 mm wide satin ribbon. First, you need three pieces of ribbon with almost equal length. All three pieces should be longer than the length of the braided ribbon so that it can be glued to the back. I cut 15 cm for a braided ribbon of 8.5 cm. The lengh of the pieces depend on how closely you braid them.
Ich habe 6 mm breites Satinband verwendet. Zuerst braucht man 3 etwa gleich lange Stücke des Bandes. Alle 3 Bänder sollten länger sein, als die zu flechtende Band-Länge, damit es noch an der Rückseite festgeklebt werden kann. Ich habe hier ca. 15 cm Band für ein geflochtenes Band von 8,5 cm zugeschnitten. Wie lang das Band sein muss, hängt davon ab, wie eng ihr flechtet.
First I attach all three ribbons next to each other on one double-sided tape (top right on photo). I glue this tape on the back of the card. Then I attach a Tacky Tape (6 mm wide) on my card - starting and ending on the back side.
Zuerst klebe ich alle drei Bänder nebeneinander auf ein doppelseitiges Klebeband (oben rechts im Foto), dass ich auf die Kartenrückseite klebe. Außerdem habe ich ein Tacky Tape Breite 6 mm - beginnend und endende auf der Rückseite auf die Karte geklebt .
I start braiding on the back side, because the beginning does not look beautifully. I attach the braided ribbon on the Tacky Tape, because the ribbon is very smooth and the braiding is easier and even if you glue it on tape.
Ich fange auf der Kartenrückseite an zu flechten, da der Ansatz nicht so schön aussieht. Ich klebe das geflochtene Band auf dem Tacky Tape fest, da die Flechtung von diesem sehr glatten Band so schön gleichmäßig wird.
Probably you've learnt braiding in elementary school, but for all who have not - this is how to do it:
I begin with a ribbon on the outside, turn it around and stick it diagonally down in the middle. As you can see on the photo now two ribbons lay on one side. Then take the outside ribbon, turn it to the middle and attach it diagonally on the tape. To make sure everything looks nice and even and is centered on the tacky tape, always atach the ribbon at the same angle downwards.
Wahrscheinlich haben die meisen von euch bereits in der Grundschule gelrent wie man flechtet, aber für alle die es nicht gelernt haben, hier kurz wie das geht:
Ich fange mit einem Band außen an, wende es und klebe es schräg nach unten zur Mitte. Wie man sieht liegen die Bänder dann auf einer Seite doppelt. Dann fängt man hier wieder mit dem äußeren Band an und klebt es umgedreht zur Mitte auf den Klebstreifen. Damit alles schön gleichmäßig aussieht und auch mittig auf dem Klebeband festsitzt, sollte man die Bänder möglichst immer im gleichen Winkel nach unten abgeschrägt aufkleben.
Have fun trying this!
Viel Spaß beim Ausprobieren!
Hugs,


1 comment:
Das sieht sehr hübsch aus!
Post a Comment