Showing posts with label Stampin' up. Show all posts

Saturday, October 16, 2010

Faux Metallic Autumn Colours - Herbstfarben und faux metallic

eine Karte in Herbstfarben / a Card in autumn colours
 

Der Hintergrund sieht aus wie Blattmetall, ist aber auf Glanzfotopapier erstellt: Dafür habe ich eine Farbwalze von Speedball mit Brilliance Ink in Kupfer und Gold betupft und solange auf dem Fotopapier abgerollt bis die Farbe dunkel genug war.

The background looks like metallic sheets, but is created on glossy photo paper: For this I dabbed a speedball-brayer with Brilliance ink in copper and gold, and rolled it onto the photo paper until the color was dark enough.


Der Baum und das Sentiment wurde mit Versamark gestempelt und Embossingpulver verwendet. Beim Embossen der Fotopapiers sollte man den Embossingfön allerdings sehr vorsichtig benutzen, da das Fotopapier leichter schmilzt als Glanzkarton. Wie man sieht ist der Baum aber schön dreidimensional geworden. :-)  

The Tree and the sentiment is stamped with Versamark and coated with embossing powder. While embossing on photo paper you should use the Embossing heat gun very carefully, because the photo paper melts more easily than normal glossy paper. As you can see the tree really looks three-dimensional. :-)


 Hier die Innenseite der Karte: / This is the inside of the card:
Die Blätter sind sind aus goldfarbenen Leinenpapier ausgestanzt und alle Ränder mit braunem und schwarzem Versamagic distressed.
The leaves are made from golden linenpaper and the edges distressed with brown and black VersaMagic.
 
Für den Hintergrund habe ich auch die "Resist"-Technik verwendet, die auf den meisten Fotos nicht sichtbar ist: Bevor ich den Hintergrund mit der Walze eingefärbt habe, habe ich Blumen mit Versamark auf das Fotopapier gestempelt. Entweder man lässt das Ganze über Nacht trocknen oder hilft nach mit einem Embossingfön. Danach habe ich alles eingefärbt und vorsichtig mit einem weichen Tuch darübergewischt.  

For the background I have used the "resist" technique used that is not visible on most of the photos: Before I coloured the background with the brayer, I have stamped the flowers with Versamark. It's best to let the ink dry over night or use an Embossing tool instead. Then colour everything and gently wipe off some ink with a soft cloth.
Stamps: Stampin' up
Ink: Versa Mark, Brilliance
Tools: Speeball Brayer, CM Leaf Punch
Embellishments: Ribbon (Aldi ), eyelets
Paper: glossy photopaper
Colored with Brilliance Ink

Mit dieser Karte nehme ich an folgenden Challenges teil:
Delightful Sketches: Metal Mania
Paper Sundaes: A Change of Season
Kaboodle Blog: Fall is in the air
Stampin' for the Weekend:  Fall
Crafty Calendar:  Birthdays/Autumn Colors


Hugs,

Monday, July 5, 2010

Flower Pot Card / Blumentopf-Karte

Diese Karte habe ich nach der Idee von Kim Burmeister gebastelt. Auf Ihrem Blog gibt es ein Tutorial für eine Clown-Karte, die nach dem gleichen Prinzip gebastelt ist. Im Video zeigt sie die Blumentopf-Karte bei 30 Sekunden. Das Video findet ihr hier.

I made this card finding the idea on Kim Burmeister's Blog. There is a tutorial for a clown card, which is made with almost the same dimensions. In the video the flower pot card is shown at 30 Seconds. You can find her video here.

Außerdem hat sie noch ein Post mit einem Foto von der Blumentopf-Karte.
Her blog also has a post with a photo of the flower pot card.

Zwei der Blumen kann man mit der inneren Karte herausziehen. Der Blumentopf ist aus Büttenpapier in Terracotta gemacht. Die Ränder sind mit dunkelbrauner VersaMagic-Ink distressed.

Two of the flowers can be pulled out with the card. The flower pot is made of  terracotta paper and the edges are distressed with dark brown VersaMagic-Ink.
Die Blätter sind aus weißen Fotoglanzpapier ausgestanzt und die Blumen mit Versamagic gestempelt und danach mit einem Pinsel Brilliance Ink in Platin aufgetragen. Die Blüten sind leicht nach hinten gebogen, so dass die Blumen plastischer aussehen. Damit die Blumen unterschiedlich hoch sind, habe ich 3D-Klebepads verwendet.

The leaves are cut from white glossy photo paper, the flowers are stamped with Versamagic and then Brilliance Ink in platinum is applied with a brush. The flowers are slightly bent, so that they look a little more dimensional. I used 3D-foampads to attach them in different heights.

Stamps: Flowers by Stampin' up
Ink: VersaMagic (black, brown & blue) & Brilliance  (platinum)
Tools: Martha Stewart Frond Punch
Paper: Terracotta Büttenpapier by Hahnemühle


Mit dieser Karte nehme ich an folgenden Challenges teil:
Delightful Sketches:  It's all about Summer
Kaboodle Blog: Celebrate Summer
Crafty Calendar:  Summer
By the cute & girly:  Warm Summer Days
Sir Stampalot Challenge:  Lazy Hazy Days of Summer
One Stop Craft Challenge: Distressing

Hugs,

Tuesday, May 25, 2010

Singing "Lena" for the Eurovison Song Contest 2010 - a Chocolate Box

Hurra, ich hab's geschafft! Am Wochenende habe ich die restlichen 200 Seiten von "Bis(s) zum Ende der Nacht" gelesen. Und auch wieder etwas gebastelt. :-)

Yippie! This weekend I have read the remaining 200 pages of "Breaking Dawn". And started stamping again. :-)


Eine kleine Geschenk-Box für zwei Schokoladen-Täfelchen! 
A small gift box for two chocolates!
Das Image ist mit Twinkling H20 coloriert und das ausgestanzte "congrats" mit 3D-Klebern aufgeklebt.

The image is colored with Twinkling H20 and the sentiment is popped up with 3D-pads.

Und die gibt es auch zu einem bestimmten Anlass: Diese Woche gibt es den Eurovision Song Contest (oder auch "Grand Prix" - wie ich ihn immer noch gerne nenne). Ich bin ein großer Fan und sehe den Grand Prix seit 1986 (jedes Jahr)! Interessanterweise hat in dem Jahr ein Mädchen namens Sandra (Kim) gewonnen...

And for a particular occasion: This week is the Eurovision Song Contest (ESC). I am a big fan and watch the ESC since 1986 (every year)! Interestingly, in that year a girl named Sandra (Kim) won the contest ...


For all my readers who don't come from Europe - a short explanation what the ESC is about: Almost each European Country sends a singer or band to this Contest with a song representing the country. This year the Contest is in Oslo, because last year a Norwegian singer has won the contest. Here you can find his winner-Song "Fairytale" which sounds a little irish (that's at least what I think)! I love this contest, because some of the songs and contestants have really nice songs, but I also love it, because every year there are who are pretty weird! Actually some years the german songs are the weirdest - don't let me think of 2009, when the german contestant (in silver leggings) had Dita von Teese on stage with very little to dress and a whip in her hand, that song was called "Miss Kiss Kiss Bang"... (still ROFL about that when I think of that embarrassing performance).


Dieses Jahr schickt Deutschland ja Lena nach Oslo und deshalb habe ich die "lieder singende Charlotte" einfach mal in Lena umbenannt und sie hat zumindest dunkles Haar bekommen.

 This year Germany sends Lena as a contestant to Oslo and I renamed the "singing Charlotte" to "Lena" and at least I made her hair brown like Lenas. If you haven't heard her song "Satellite" yet, please click here for the youtube-Video. It's a really catchy song - I think which gets better by every time I hear it. Actually I hum it in the bathroom in the morning - if you hear me doing that you probably won't like the song anymore... ;-)


Da wir am Samstag eine kleine Grand Prix-Party feiern, gibt es natürlich auch ein kleines Tipp-Spiel, wer denn die Top 5 schafft und welchen Platz Lena schaffen wird. Der Gewinner darf sich über diese kleine Box freuen und noch ein paar Pralinen freuen:

On Saturday we celebrate the ESC with a little party, I will do a little betting game for it, guessing the top five and Lena's final place. The winner will get this little box and some Pralines:


Stamps: Lieder singende Charlotte (Singing Charlotte) by Whiff of Joy,
Flower Stamps by SU
Ink: Brilliance
Embellishments: Stickles, Organza Ribbon
Colored with Twinkling H2O

Und so sieht es dann nach dem Öffnen aus. Lecker! :-)
Die Schokolade ist mit kleinen Glue Dots auf der Rückseite an der Schachtel festgeklebt.

And this is how it looks like after opening. Yummy! :-)
The chocolate is attached to the box with small glue dots on the back.

Wenn ihr auch den ESC mögt, schaut diese Woche zu meiner nächsten Post wieder vorbei: Am Freitag nach dem zweiten Halbfinale poste ich meinen Tipp für das Finale!

If you also like the ESC please come back for one of my next posts this week. I will post my own bets on Friday after the second semifinal!

Mit dieser Karte nehme ich an folgenden Challenges teil:
Crafty Creations Challenges:  Celebration
By the cute & girly:  Celebrations
C.R.A.F.T. Challenge: Celebrate
Charisma Cardz Challenges:  3D
Secret Crafter:  No patterned paper
Stampin' for the Weekend:  make someone smile
Pile it On: Out of the Box


Hugs,

Saturday, May 1, 2010

Easel Baby Card in orange & blue


hier eine Baby-Karte mit dem Whipper Snapper Stempel "A Blessing from Heaven". Zu dem Stempel gehört auch der Ballon mit der Aufschrift "Welcome": Den Ballonstempel habe ich zweimal auf weißem Glanzkarton gestempelt, einmal ohne den Schriftzug. Den Glanzkarton habe ich mit Memento-Stempelkissen eingefärbt.

Die Blume ist mit den Spellbinders "Blossom" aus weißem Filz ausgestanzt und mit verdünnter Distress Ink eingefärbt.


here's a baby card with the Whipper Snapper Stamp "A Blessing from Heaven". The stamp includes the balloon with the words "Welcome": I have stamped the balloon on white glossy paper twice , one without the sentiment. The glossy paper is colored with Memento ink pads.

The flower is the Spellbinder "Blossom" punched out of white felt and dabbed in Distress Ink with water.

Stamp: "A Blessing from Heaven" from Whipper Snapper,  
Branch: Fresh Cuts by SU,  Flowers: Block Set by Autumn Leaves
Ink:Memento
Tools:Edge Punch by SU, Corner Punch by CM
Colored with Copics

Mit dieser Karte nehme ich an folgenden Challenges teil:
Dutchdare Card Challenge:  Easel Card with Repeats
Delightful Sketches:  Pull out your Punches
Alice in Wonderland Challenge:   Children's Card
Die Cut Dreams Challenge:   Make your own flowers
Spoon Full of Sugar:  3D Something
Creative Inspirations:  Easel Card
Cute Card Thursday:  make your own
Stempelträume: Tiere
Pile it On: Make it sweet
By the cute & girly:  Celebrations

Hugs,

Tuesday, April 27, 2010

On Tiptoe - a Fairy Garden on Canvas

Hallo allerseits, heute habe ich ein etwas aufwendigeres Projekt gebastelt. Ich nehme damit unter anderem an der ersten Sir Stampalot Challenge teil. Thema ist "Fantasy" und zu gewinnen gibt es eine Cricut! Und das ist ja auch ein Preis wie im Märchen... ;-)

Hi there,
today I made a project that was a bit more time-consuming. With this nice little Fairy I take part in the first Sir Stampalot Challenge. I've already made a Card for it and now did a different project. The theme is "Fantasy" and there is a Cricut to win! And that is indeed a price that is fantastic ... ;-)


Die Grundfläche ist ein Keilrahmen im Format 15 x 15 cm. Die Leinwand ist mit Glimmer Mist besprüht, damit sie glänzt und dann mit Glitter bestreut. Wie man auf diesem Foto sieht, kann man wunderbar die ganze Grundfläche sehen, das liegt daran, dass der Rahmen an der hinteren Seite ca. 3 cm höher liegt als vorne. Der Rahmen wird von den vier Seitenteilen gehalten. Außerdem habe ich unter den hinteren Teil des Rahmens noch zusätzliche Pappe als Stütze geklebt.

Die Umrandung ist aus schwarzem Karton, den ich mit Brilliance "Platinum Planet" betupft habe. Die Tinte schimmert sehr schön, was man leider auf den Fotos nicht sieht. Und zur Verzierung Strass-Steine.

The base is a wooden frame with canvas (sorry, I don't know the english word for that, but if someone can tell me it would be fine) sized 15 x 15 cm. First the canvas is sprayed with Glimmer Mist and then some Glitter added. As you can see in this photo, the whole ground area is visible, this is because the frame is about 3 cm higher at the back than at the front. The frame is held by the four sides. I've also added some cardboard under the back of the frame for support.

The border is made of black cardstock, which I have dabbed with Brilliance Platinum Planet. The ink shimmers, but unfortunately this is invisible on the photos. And as a decoration some rhinestones.


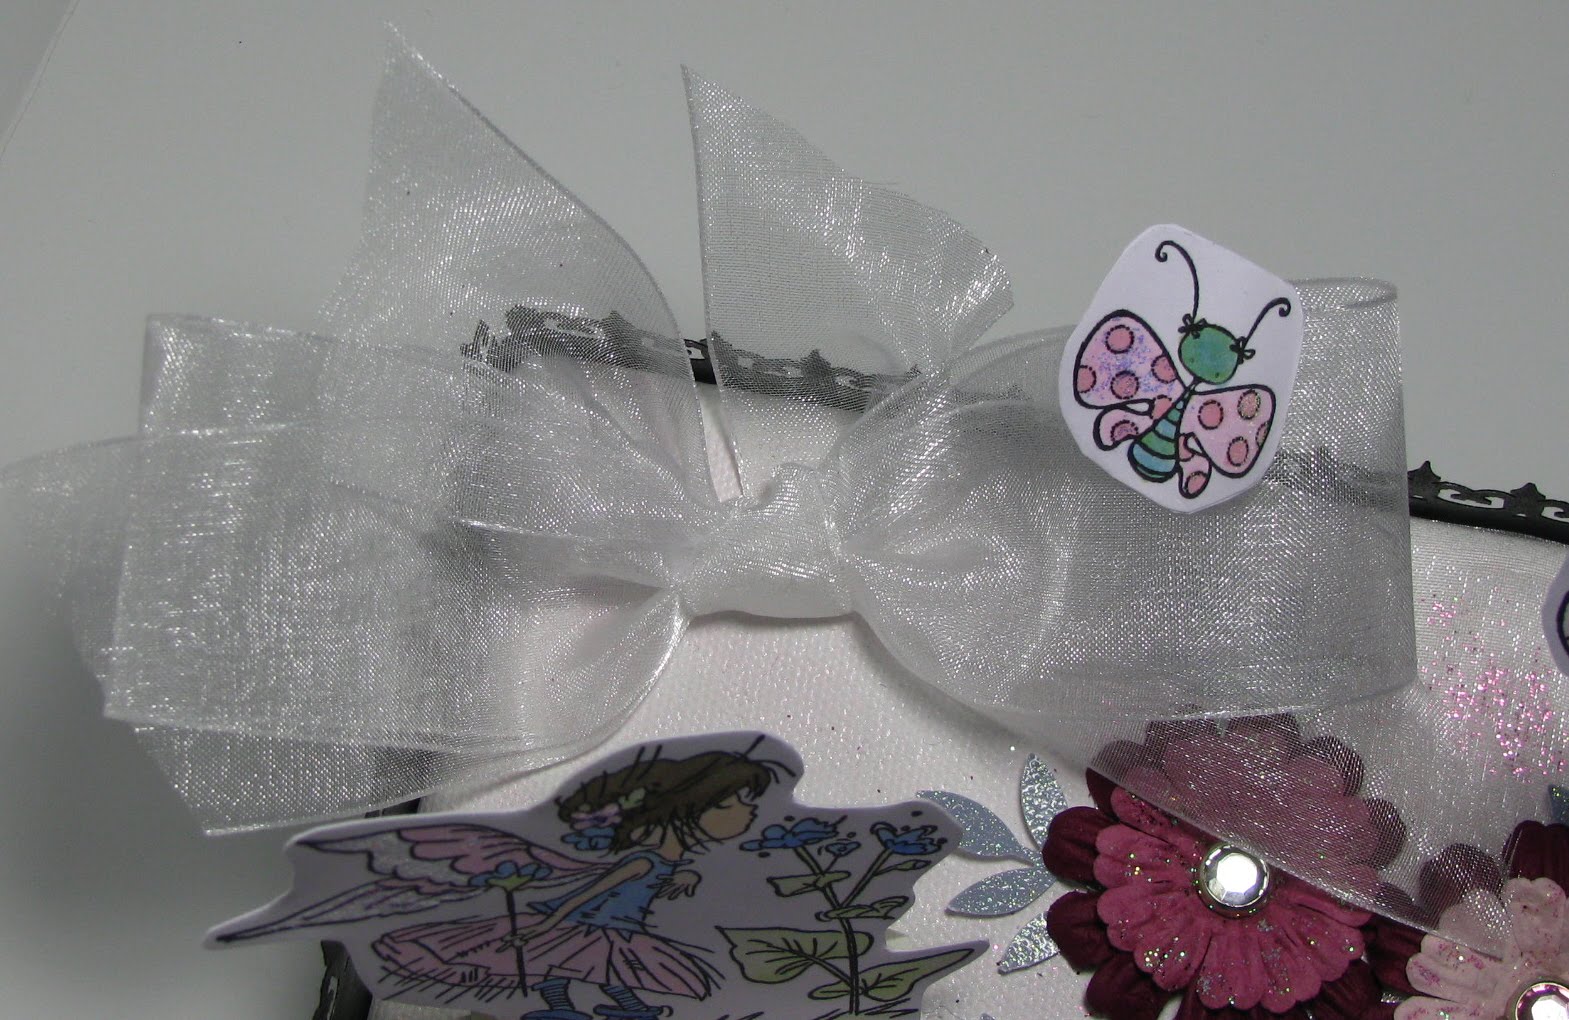
Ich habe den Stempel "On Tiptoe" von Lili of the Valley benutzt. Die Flügel der Elfe, die Schmetterlinge und die Blumen sind mit Stickles glänzend gemacht.

I used the stamp "On Tiptoe" by Lili of the Valley. The wings of the fairy, the butterflies and flowers are made shiny with Stickles .


Hier sieht man die Schmetterlinge: Ich habe jeweils zwei Stempelabdrücke gleich coloriert und einen mit ein bißchen Rand ausgeschnitten, mit Klebstoff bestrichen und einen feinen Silberdraht in die Mitte gelegt, dann den zweiten Abdruck aufgeklebt und nochmals ausgeschnitten. Die Schmetterlinge sind nur grob ausgeschnitten, da sie nicht ganz symmetrisch sind. Der Draht ist elastisch und so wippen die Schmetterlinge, wenn man sie antippt. Die Rückseite habe ich bedruckt, da sich die "fliegenden" Schmetterlinge auch leicht drehen.


Here you can see the butterflies: I colored two images equal and a cut one leaving a little edge, coated with glue and put a fine silver wire in the middle, then stuck the second impression on the back, and again cut the images out. The butterflies are only roughly cut, as they are not completely symmetrical. The wire is elastic and so the butterflies move when they are tipped. I've also put an image on the back, as the "flying" butterflies also rotate slightly.


Im Detail / In Detail
Der Silberdraht is an dem Charm und der Schleife aus Mesh festgebunden.
The silver wire is tied to the charm and the mesh bow.


Meine Organza-Schleife mit Schmetterling / My Organza-Bow with Butterfly:


Hier noch mal ein Foto von oben:
Same thing from above:

Stamps: On Tiptoe by Lili of the Valley,
Butterfly by Stamping Bella, Rabbit by SU

Ink: Memento Black, Brilliance Platinum
Tools: Keilrahmen 15 x 15 cm, silverwire, Martha Stewart punches
Embellishments: Charm by Whiff of Joy, Chrystal Brads,
Flowers & Ribbon

Colored with Copics & Stickles


Mögt ihr auch Filme? Wenn ja, hier noch ein exclusiver Blick "Behind the Scenes"
Do you like movies too? If so, here is an exclusive look "Behind the Scenes" ;-)

Auf diesem Foto sieht man, dass auch die Rückseite des Schmetterling bedruckt ist. Außerdem sieht man auch sehr gut daß der Rahmen schräg nach vorne geneigt ist. Da der Boden ja schräg ist, mussten natürlich auch die Elfe und der Hase schräge auf den Boden geklebt werden. auf diesem Foto sieht man das sehr gut.

In this photo you can see that the back of the butterflies is stamped. You also can see that the frame is inclined obliquely forward. Because of the inclined ground, also had the Fairy and the rabbit are attached slanted onto the floor. In this photo you can see this very well.


Mit dieser Deko nehme ich an folgenden Challenges teil:
Sir Stampalot Challenge: Fantasy
By the cute & girly: Fairytale
Simon says Stamp Challenge: Things with Wings
Stamp Something: charmed somethings


Hugs,

Sunday, April 18, 2010

Easel Card with Butterflies


Hier eine Schmetterlingskarte mit Stampin' up-Stempeln. Es ist eine Easel Card, die man aufstellen kann. Da ich bisher nicht wußte, was "Easel" denn überhaupt übersetzt heißt, habe ich mal bei LEO (meiner liebsten Übersetzungsseite) nachgesehen:

Easel = Staffelei ( und so sieht es ja auch passenderweise aus)


This is my Easel-Card with Butterflies :

Der große Schmetterling ist zuerst auf weißen Papier in orange gestempelt, die Blumen sind auf Transparentpapier gestempelt und dann beide Teile ausgestanzt. Das Transparentpapier ist mit einen Klebepunkt nur in der Mitte aufgeklebt. Die silberfarbene Kordel ist elastisch. Ich finde diese Kordeln wirklich klasse, weil sie rund sind und daher so schön erhoben sind. Es gibt sie in gold und silber von Meyco.

The large butterfly is stamped on white paper in orange, the flowers are stamped on transparent paper and then both parts are punched out . The transparent paper is attached with a glue dot in the middle.

The silver cord is elastic. These cords are great, because they are round and so add a bit of dimension to the card.

Stamps: Stampin' up
Ink: chocolate brown (SU)
Tools: Butterfly Punch (SU)
Embellishments: silver elastic cord (Elastik Kordel)


Mit dieser Karte nehme ich an folgenden Challenges teil:
Die Cut Dreams Challenge: Vintage & no coloring
Cute Card Thursday: Texture
Stamp Something: something layered
Secret Crafter: a day out


Hugs,

Tuesday, March 30, 2010

Fresh Cuts on Glossy Paper

eine Frühlingskarte / a spring card:

Stamps: Fresh Cuts by SU
Ink: Cat's Eyes by ColorBox "Metallics", Brilliance Black
Tools: Speedball Brayer, Crop-A-Dile, Punch (Rundes Etikett) by SU
Paper: Glossy Paper, linen structured paper


Für die zwei Layer der Karte habe ich zwei Stücke "Glossy Paper" (es geht auch Fotopapier) mit einer Farbwalze von Speedball eingefärbt. Hierfür habe ich kleine Cat's Eyes Stempelkissen benutzt und die Farbe nacheinander auf die Walze von einer Seite zur anderen getupft.

Vor dem Stempelaufdruck habe ich eines der Glossy Paper um 180 Grad gedreht, damit die Farben genau gegenläufig unter dem Stempelabdruck verlaufen. Der Abdruck wurde mit Brilliance Ink gemacht.

Danach habe ich mit dem Crop-a-Dile einen der Abdrucke gelocht und mit 3D-Klebepads in der Mitte erhöht aufgeklebt.

For the two layers of the card I coloured two pieces of "Glossy Paper" (or photopaper) with a brayer from speedball. For this I have dabbed small Cat's Eyes Ink Pads on the brayer working from one side to the other.

Before stamping I turned one of the glossy papers 180 degrees so that the color stripes are in the opposite direction. The image was stamped with Brilliance ink.

After that I punched out circles with a Crop-a-Dile on one of the images and layered it with foam-pads attached in the middle of the paper.


Hier sieht man die zwei Layer bevor sie zusammengeklebt sind:
Here you can see the two layers before they are attached:


Mit dieser Karte nehme ich an folgenden Challenges teil:


Truly Scrumptious: Sketch
Cute Card Thursday: Dimensions
Simon says Stamp Challenge: Easter or Spring & Glimmer
Everybody Art Challenge: Frühling
Charisma Cardz Challenges: Spring has sprung
Secret Crafter: Pink, Green & Flowers
Alice in Wonderland Challenge: Fine Print
Paper Sundaes: Photo Inspiration
Colour Create Challenge Blog: Pastels
Papertake Weekly Challenge: open theme


Hugs,

Saturday, March 13, 2010

::: Tutorial: Folded Cards with Spellbinders ::: ::: Fleur de Lis :::

Hier eine Klappkarte, den ich mit den Spellbinders Fleur de Lis passend zu meiner Lazy Afternoon-Karte gemacht habe.

Here is a folded card that I have made with the Spellbinders Fleur de Lis fitting my Lazy Afternoon card.

So sieht die Vorderseite aus: / This is the Cover:
Das Band ist nur durch die Vorderseite der Karte gezogen. / The ribbon is drawn through the front of the card only.

Dies ist die Innenseite:
/ This is the inside:
Und für alle, die noch keine Klappkarte aus Spellbindern gemacht haben, hier der Trick:
1. Zuerst das Papier in der Mitte falten
2. Dann die gefaltete Kante auf dem Spellbinder so hinlegen, dass das Papier nicht bis an den äußeren Rand geht. Siehe Foto.
3. Ich befestige das Papier dann mit zwei kleinen Stücken Tesafilm, damit es an der richtigen Stelle bleibt.

Und dann nur noch ausstanzen... :-)


And for those who haven't made a folded card with spellbinders yet, here's the trick:
1. First, fold the paper in the middle.
2. Lie down the folded edge on the Spellbinder that the folded side does not to reach the outside edge fully. See photo.
3. I attach the paper with two small pieces of tape so that it remains in place.
And then punch your card... :-)


Hier die Rückseite, auf der ich eine weitere Stanze aus dem Fleur de Lis Set benutzt habe.
Das lila Papier ist die ausgestanzte Form. Die Stanzen habe ich auf ein Stück weißen Karton gelegt, mit Bleistift herumgezeichnet und dann ausgeschnitten. So bekommt man einen schönen gleichmäßigen Rand...
Den weißen Karton habe ich dann noch mit einem Schwämmchen und Brilliance Platinum Planet betupft.

Here is the backside, on which I used another punch from the Fleur de Lis Set.
After I punched out the purple paper, I put the die on a piece of heavy white cardstock, marked the outline with a pencil and then cut it out. So you get a really nice smooth edge ...
After that I dabbed the white carstock with a sponge and Brilliance Platinum Planet ink.

Stamps: Stampin' up
Ink: Brilliance
Tools: Spellbinders Fleur de Lis
Embellishments: Ribbon (Depot)


Hugs,