
Hi there,
today I made a project that was a bit more time-consuming. With this nice little Fairy I take part in the first Sir Stampalot Challenge. I've already made a Card for it and now did a different project. The theme is "Fantasy" and there is a Cricut to win! And that is indeed a price that is fantastic ... ;-)

Die Grundfläche ist ein Keilrahmen im Format 15 x 15 cm. Die Leinwand ist mit Glimmer Mist besprüht, damit sie glänzt und dann mit Glitter bestreut. Wie man auf diesem Foto sieht, kann man wunderbar die ganze Grundfläche sehen, das liegt daran, dass der Rahmen an der hinteren Seite ca. 3 cm höher liegt als vorne. Der Rahmen wird von den vier Seitenteilen gehalten. Außerdem habe ich unter den hinteren Teil des Rahmens noch zusätzliche Pappe als Stütze geklebt.
Die Umrandung ist aus schwarzem Karton, den ich mit Brilliance "Platinum Planet" betupft habe. Die Tinte schimmert sehr schön, was man leider auf den Fotos nicht sieht. Und zur Verzierung Strass-Steine.
The base is a wooden frame with canvas (sorry, I don't know the english word for that, but if someone can tell me it would be fine) sized 15 x 15 cm. First the canvas is sprayed with Glimmer Mist and then some Glitter added. As you can see in this photo, the whole ground area is visible, this is because the frame is about 3 cm higher at the back than at the front. The frame is held by the four sides. I've also added some cardboard under the back of the frame for support.
The border is made of black cardstock, which I have dabbed with Brilliance Platinum Planet. The ink shimmers, but unfortunately this is invisible on the photos. And as a decoration some rhinestones.
Ich habe den Stempel "On Tiptoe" von Lili of the Valley benutzt. Die Flügel der Elfe, die Schmetterlinge und die Blumen sind mit Stickles glänzend gemacht.
I used the stamp "On Tiptoe" by Lili of the Valley. The wings of the fairy, the butterflies and flowers are made shiny with Stickles .

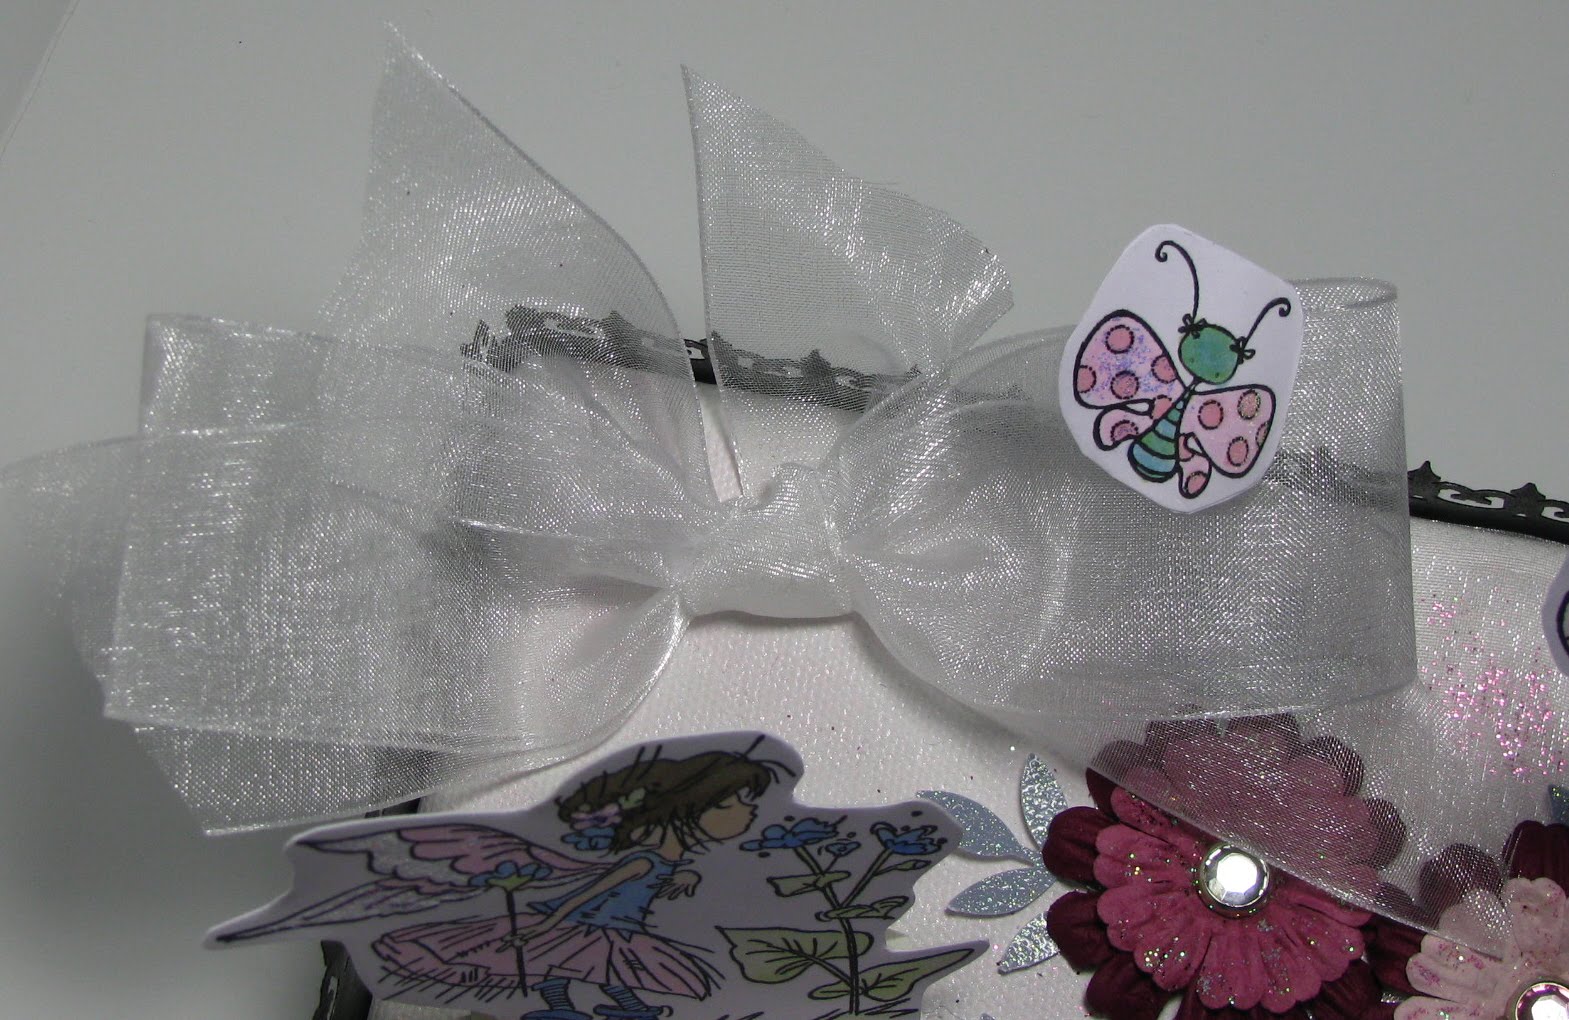
Hier sieht man die Schmetterlinge: Ich habe jeweils zwei Stempelabdrücke gleich coloriert und einen mit ein bißchen Rand ausgeschnitten, mit Klebstoff bestrichen und einen feinen Silberdraht in die Mitte gelegt, dann den zweiten Abdruck aufgeklebt und nochmals ausgeschnitten. Die Schmetterlinge sind nur grob ausgeschnitten, da sie nicht ganz symmetrisch sind. Der Draht ist elastisch und so wippen die Schmetterlinge, wenn man sie antippt. Die Rückseite habe ich bedruckt, da sich die "fliegenden" Schmetterlinge auch leicht drehen.
Here you can see the butterflies: I colored two images equal and a cut one leaving a little edge, coated with glue and put a fine silver wire in the middle, then stuck the second impression on the back, and again cut the images out. The butterflies are only roughly cut, as they are not completely symmetrical. The wire is elastic and so the butterflies move when they are tipped. I've also put an image on the back, as the "flying" butterflies also rotate slightly.

Im Detail / In Detail
Der Silberdraht is an dem Charm und der Schleife aus Mesh festgebunden.
The silver wire is tied to the charm and the mesh bow.

Meine Organza-Schleife mit Schmetterling / My Organza-Bow with Butterfly:
Hier noch mal ein Foto von oben:
Same thing from above:
 Stamps: On Tiptoe by Lili of the Valley,
Butterfly by Stamping Bella, Rabbit by SU
Ink: Memento Black, Brilliance Platinum
Tools: Keilrahmen 15 x 15 cm, silverwire, Martha Stewart punches
Embellishments: Charm by Whiff of Joy, Chrystal Brads,
Flowers & Ribbon
Colored with Copics & Stickles
Mögt ihr auch Filme? Wenn ja, hier noch ein exclusiver Blick "Behind the Scenes"
Do you like movies too? If so, here is an exclusive look "Behind the Scenes" ;-)
 Auf diesem Foto sieht man, dass auch die Rückseite des Schmetterling bedruckt ist. Außerdem sieht man auch sehr gut daß der Rahmen schräg nach vorne geneigt ist. Da der Boden ja schräg ist, mussten natürlich auch die Elfe und der Hase schräge auf den Boden geklebt werden. auf diesem Foto sieht man das sehr gut.
In this photo you can see that the back of the butterflies is stamped. You also can see that the frame is inclined obliquely forward. Because of the inclined ground, also had the Fairy and the rabbit are attached slanted onto the floor. In this photo you can see this very well.
Mit dieser Deko nehme ich an folgenden Challenges teil:
Sir Stampalot Challenge: Fantasy
By the cute & girly: Fairytale
Simon says Stamp Challenge: Things with Wings
Stamp Something: charmed somethings
Hugs,


16 comments:
wow this is so creative and just amazing!!! Love it! Hugs Juls
Hello Sandra
This is just wonderful, a whole fantasy garden scene.
You have put so much work into this project, it's amazing. Canvas is correct.
Thank you for sharing this with us at Stampalot and good luck.
B x
Just love this brilliant little fantasy scene you have created, what an excellent idea and lots of work and thought has been put into it. Thanks for sharing at Sir Stampalot this month.
Pinky
ui, was ist das toll!! und wieviel arbeit da drin steckt. wenn du damit nicht gewinnst, dann weiss ich auch nicht.... :-)
liebe grüße von mir.
Toll kreativ bist du! Das macht richtig Lust auf Frühling!!!
Oh my word Sandra this is totally wonderful the amount of love and work that you have put into this creation shines through. I adore the stamped images and the garden theme I would love to be able to join them in that garden lol...thank you so much for joining us with a second project at Sir Stampalot
Hugs
Lorraine x
Das sind so unsere Abkürzungen ;-)
AMU = Augen Make Up
EOTD = Eye od the day
FOTD ? Face of the day
l/s = lipstick
e/s = eyeshadow
Wow! This is amazing work! I love it!
Got your link ok and thanks so much for joining us at BTC&G with this brilliant creation.
Pinky
A wonderful creation, Thanks for joining the first Sir Stampalot challenge, good luck.
Happy crafting
Tracy x
Wow, what a magical creation. This is truly superb, well done you.
Thanks for taking part in the first Sir Stampalot Challenge.
Good Luck
- janicex
Hi Sandra,
This is a wonderful creation - so imaginative!
Thank you for joining us at Sir Stampalot this month.
Clare x
what a fabulous creation Sandra ! This must have taken you ages to make but it is well worth all the effort ! Brilliant ! :-)
thanks for joining the Simon Says Stamp Challenge :-)
Luv
Lols x x x
Wonderful card, Sandra! Thanks for joining in at Sir Stampalot and good luck!
Liebe Sandra!
Dein Projekt ist absolut süss, was für eine tolle Idee!
Herzlichen Dank für's Mitmachen bei meinem Candy, ich drücke dir die Daumen...
Glg,
Mo
Wow!!!! This is just wonderful!!! Really great job!
Thanks so much for joining us for the Stamp Something challenge.
Hugs, Denimo
Post a Comment